How to installation – Eclipse for Windows

1 Download the Eclipse Installer.
Download the Eclipse Installer from the official website of Eclipse.
2 Start the Eclipse Installation.
Once the download process is complete, the installation process can be started by pressing the Eclipse executable file which looks like the image below in the browser notification.

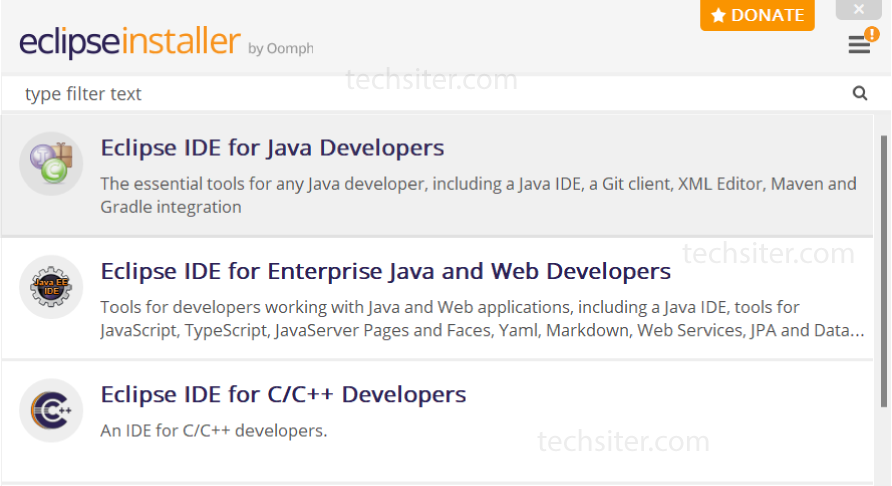
3 Choose Eclipse package to Install.
Select and click on the package you want to install. We choose Eclipse IDE for Java Developers.
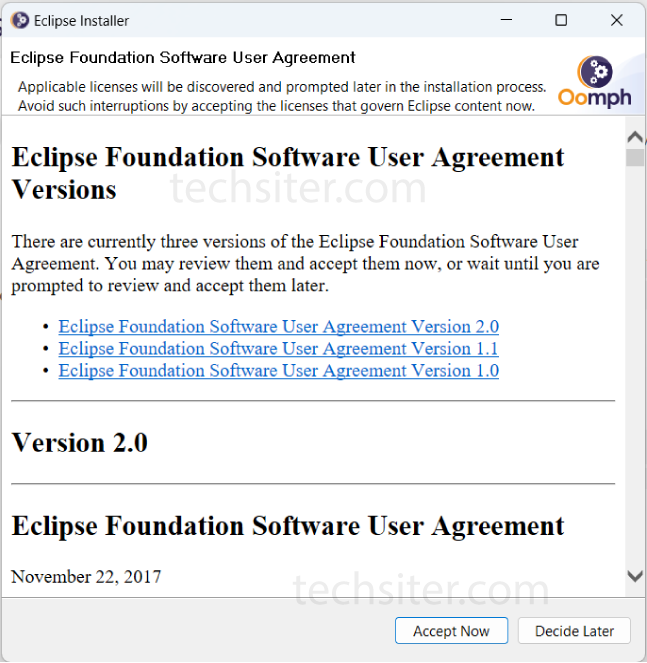
4 Accept to User Agreement.
Then click the Accept now button (Some devices are asking this conditions)
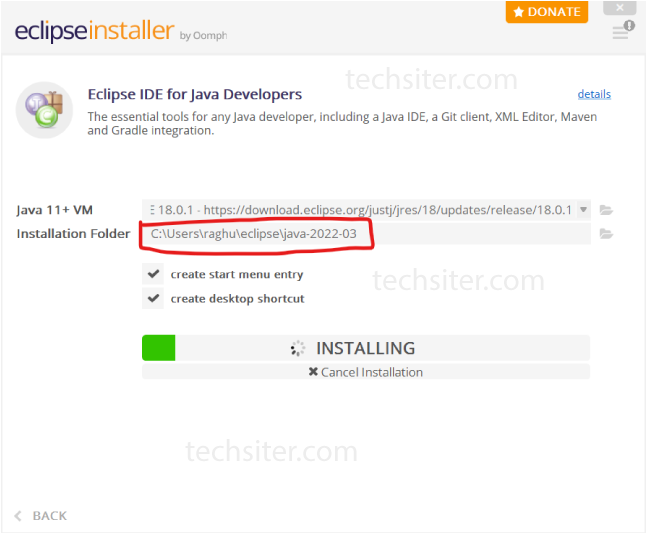
5 Choose your installation folder.
Specify the folder where you want to install Eclipse. Eclipse takes your user directory as the default folder.
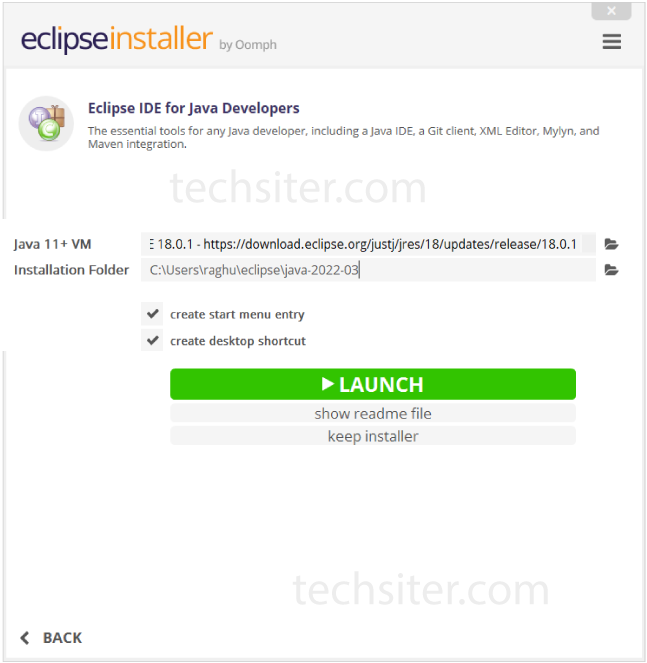
5 Launch Eclipse.
Once the installation is complete, Eclipse can be started by pressing the Launch button.
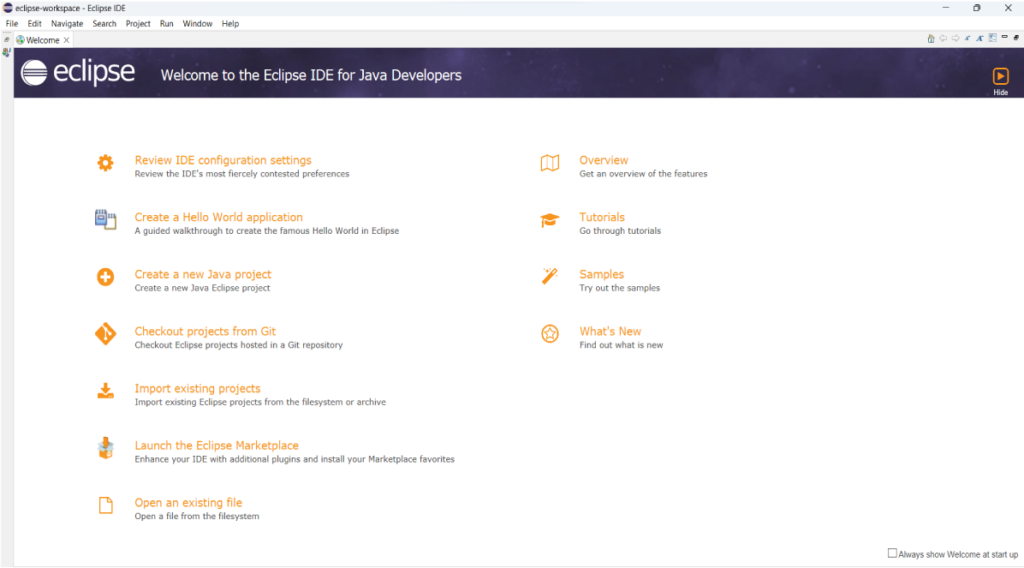
The Eclipse Welcome screen is like the picture below.
Now let’s start creating a new Java project.
Happy coding.
Related post
-
 How to creating a JAR? – it’s easy.
Creating a JAR file in Java involves compiling your Java…
-
 What is a JAR file? – it’s easy to understand
A JAR (Java ARchive) file is a package file format…
-
 Top 50 Java Interview Questions and Answers.
Here are the top 50 Java interview questions and answers…
-
 How to start creating Java class in Eclipse
To create a Java class in Eclipse you need to…
-
 How to download Eclipse for Windows or macOS.
Open your browser and type https://www.eclipse.org.The download page lists a…
Popular post
-
 Eclipse IDE – Create New Java Project.
Opening the New Java Project…
-
 How to start the project in android studio
Android Studio Open the Android…
-
 How to use ACOSH function in excel
The ACOSH function returns the…
-
 Complete Header tags in html – easy to learn
H tags can be used…
-
 Best features in Python programme – easy to learn
Python is the most widely…